Proxmox
Proxmox VE is a open-source server management platform for enterprise virtualization.
It integrates the KVM hypervisor and Linux Containers (LXC), software-defined storage and networking functionality, on a single platform.
With the integrated web-based user interface you can manage VMs and containers, high availability for clusters, or the integrated disaster recovery tools with relative ease.
Download Proxmox
Download the ISO image of proxmox here
In case you don’t have access to virtual media via IPMI, then the ISO image must be loaded into an USB drive with a tool like USBimager here.
Install Proxmox
Insert the USB, power on your rig and follow the on-screen instructions to install Proxmox.
Be specially careful when entering the timezone and networking information.
After installation and restart, you will be presented with a log-in screen showing:

Now you can open your preferred Internet browser and navigate to the url shown in the prompt above, this should open the Graphical User Interface (GUI) of Proxmox
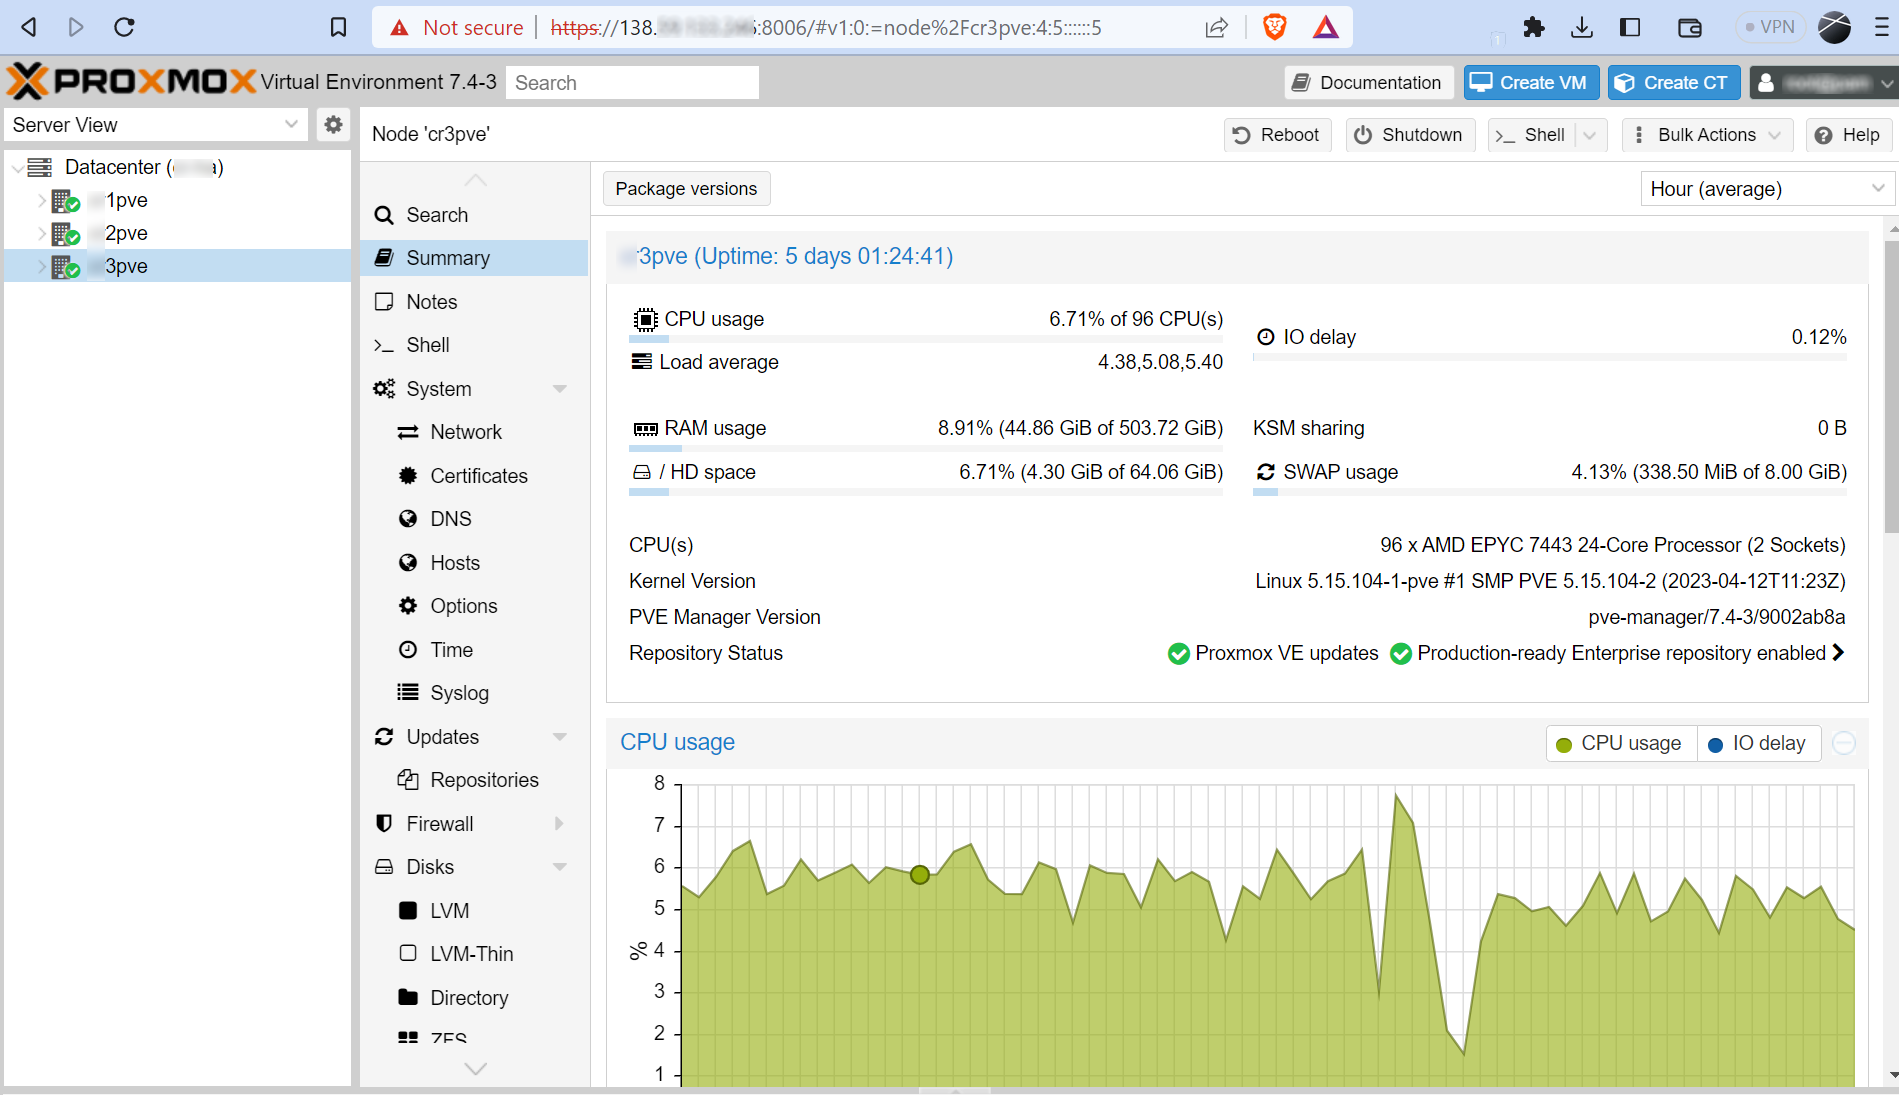
Now you are ready on your way to download Operating System (OS) images and create your first Virtual Machine (VM)
Download iso images
Before spinning any virtual machines in Proxmox, you will need to download the relevant iso images of the operating systems you want to use in said VMs.
In the particular case of Ubuntu Server, this procedure is very simple, just go to the download page:
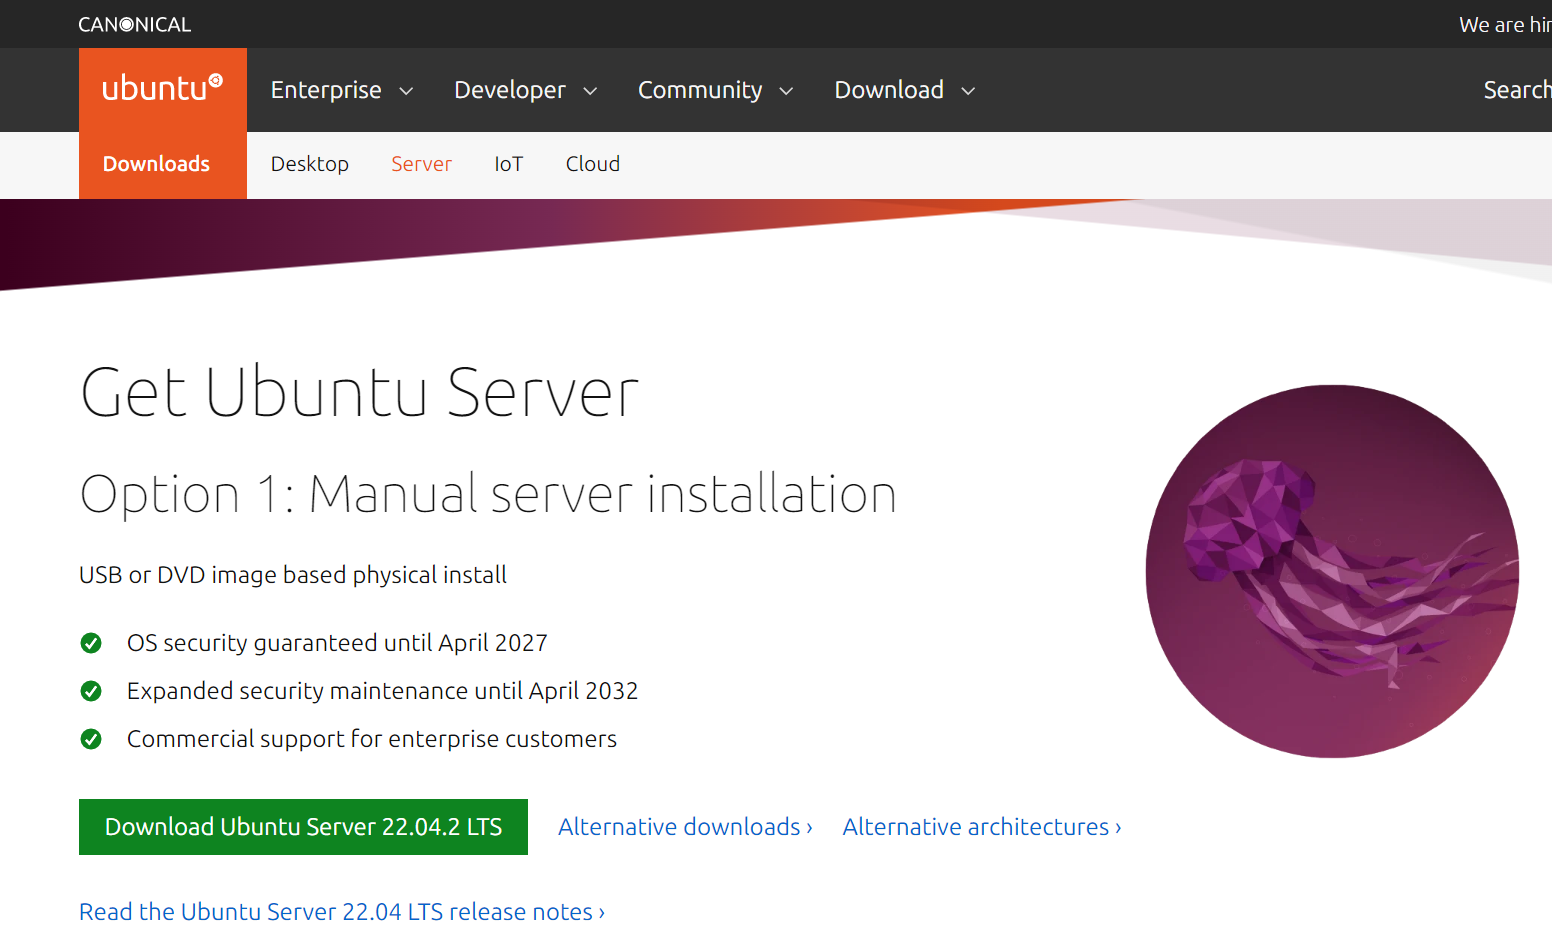
And click on the big green Download Ubuntu Server button to proceed to the download screen.
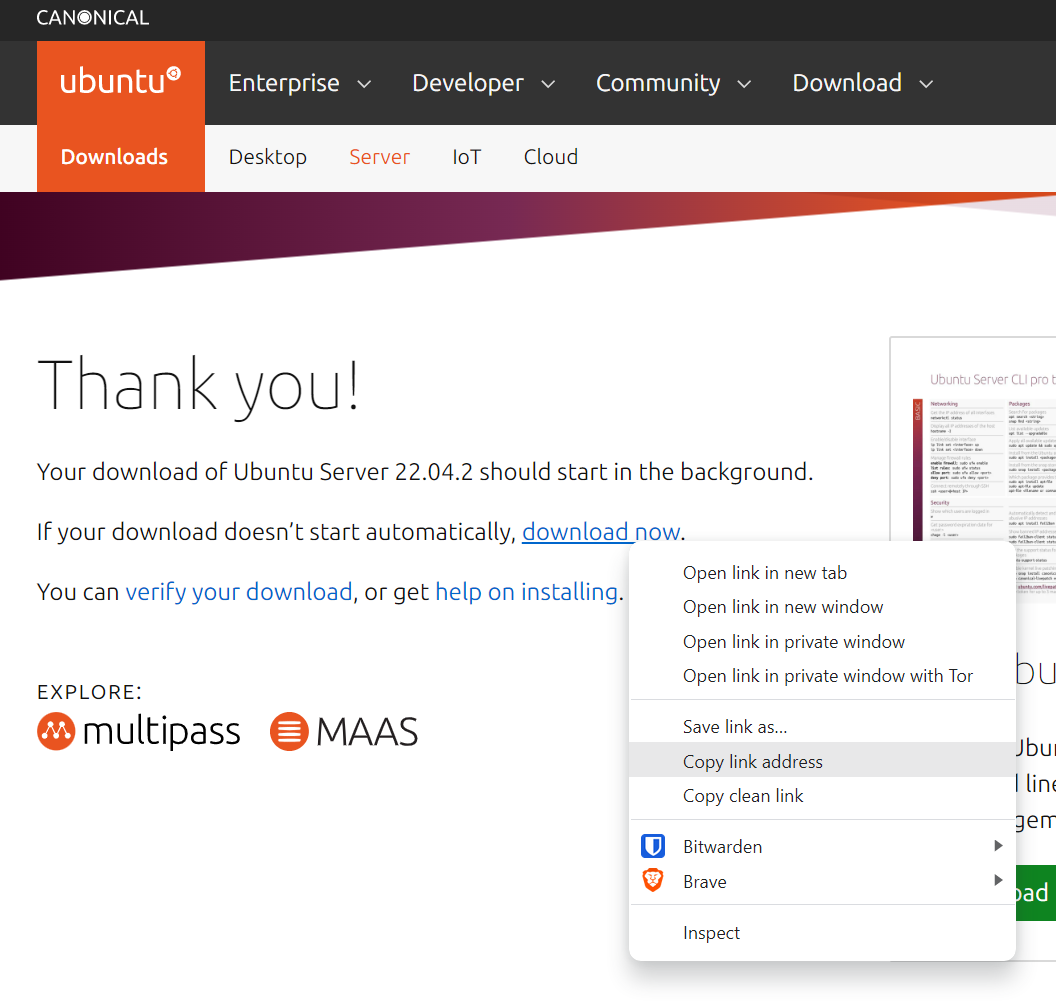
Now a pop-up window will appear on your screen, feel free to dismiss it because you don't actually want to download this file to your PC (you just need the link).
Once dismissed, you can right-click on the download now link and select Copy link address from the drop-down contextual menu:
Back in Proxmox's GUI, look for the local storage of your server in the explorer panel at the left of the screen, then select ISO Images in the list of local available items in the centre of the screen and lastly click on the Download from URL link
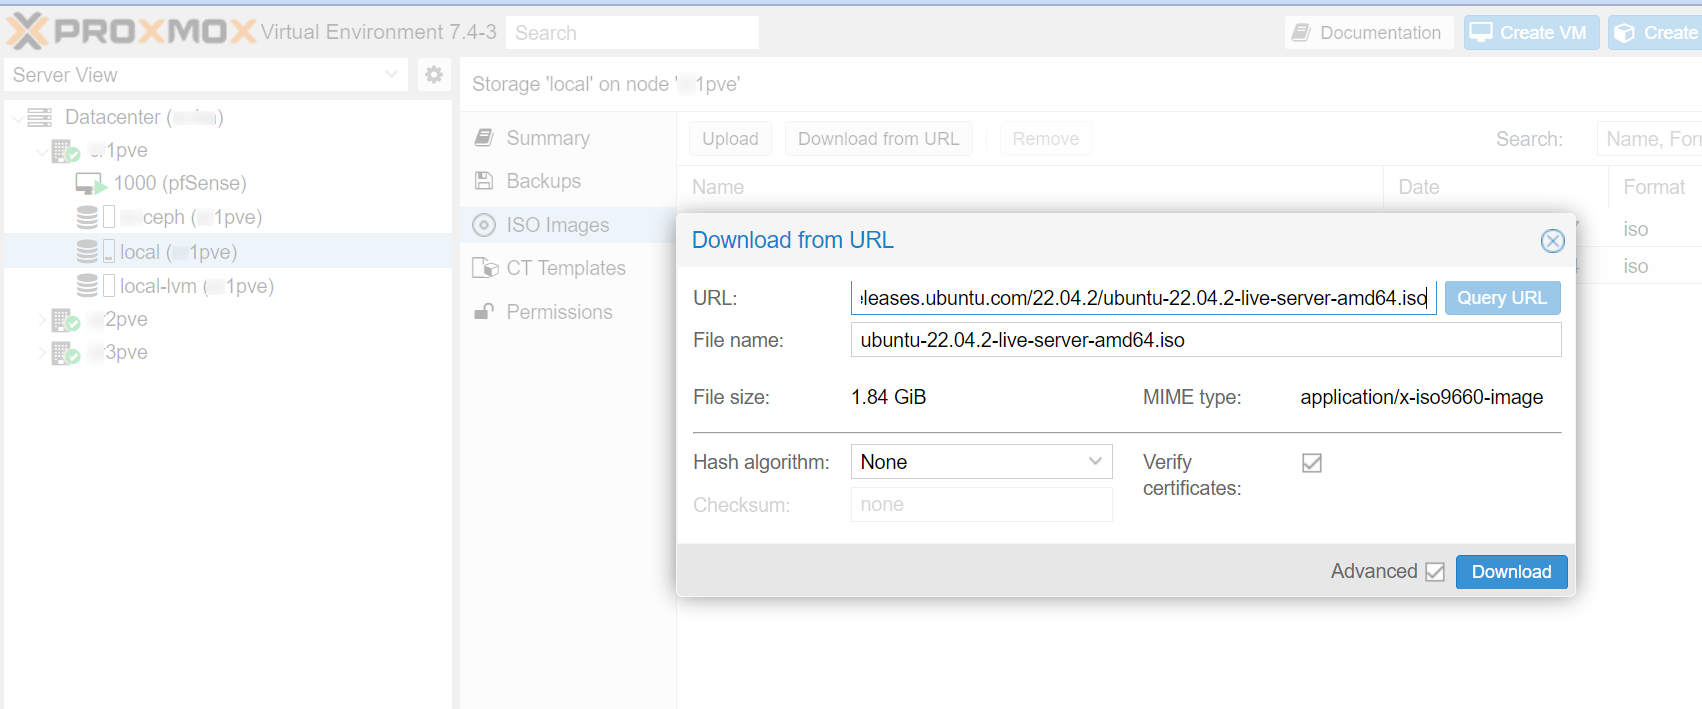
Once you paste the URL of the image in the first field of the pop-up window, click the blue Query URL button to automatically populate the rest of the form and finish with a click of the Download button.
The file should download in a few seconds / minutes, depending on your connection speed.
First VM
Before provisioning your first machine, you may want to install Proxmox in the rest of your physical servers an interconnect them in a High Availability cluster, as shown in the relevant guide
Before the creation of your first machine, please make sure that you have provisioned the appropriate storage type to the Proxmox environment, that is, for example, an local LVM device for a stand-alone server, or a Ceph pool for a High Availability cluster, please note that migrating between the these is a non-trivial and error-prone manoeuvre.
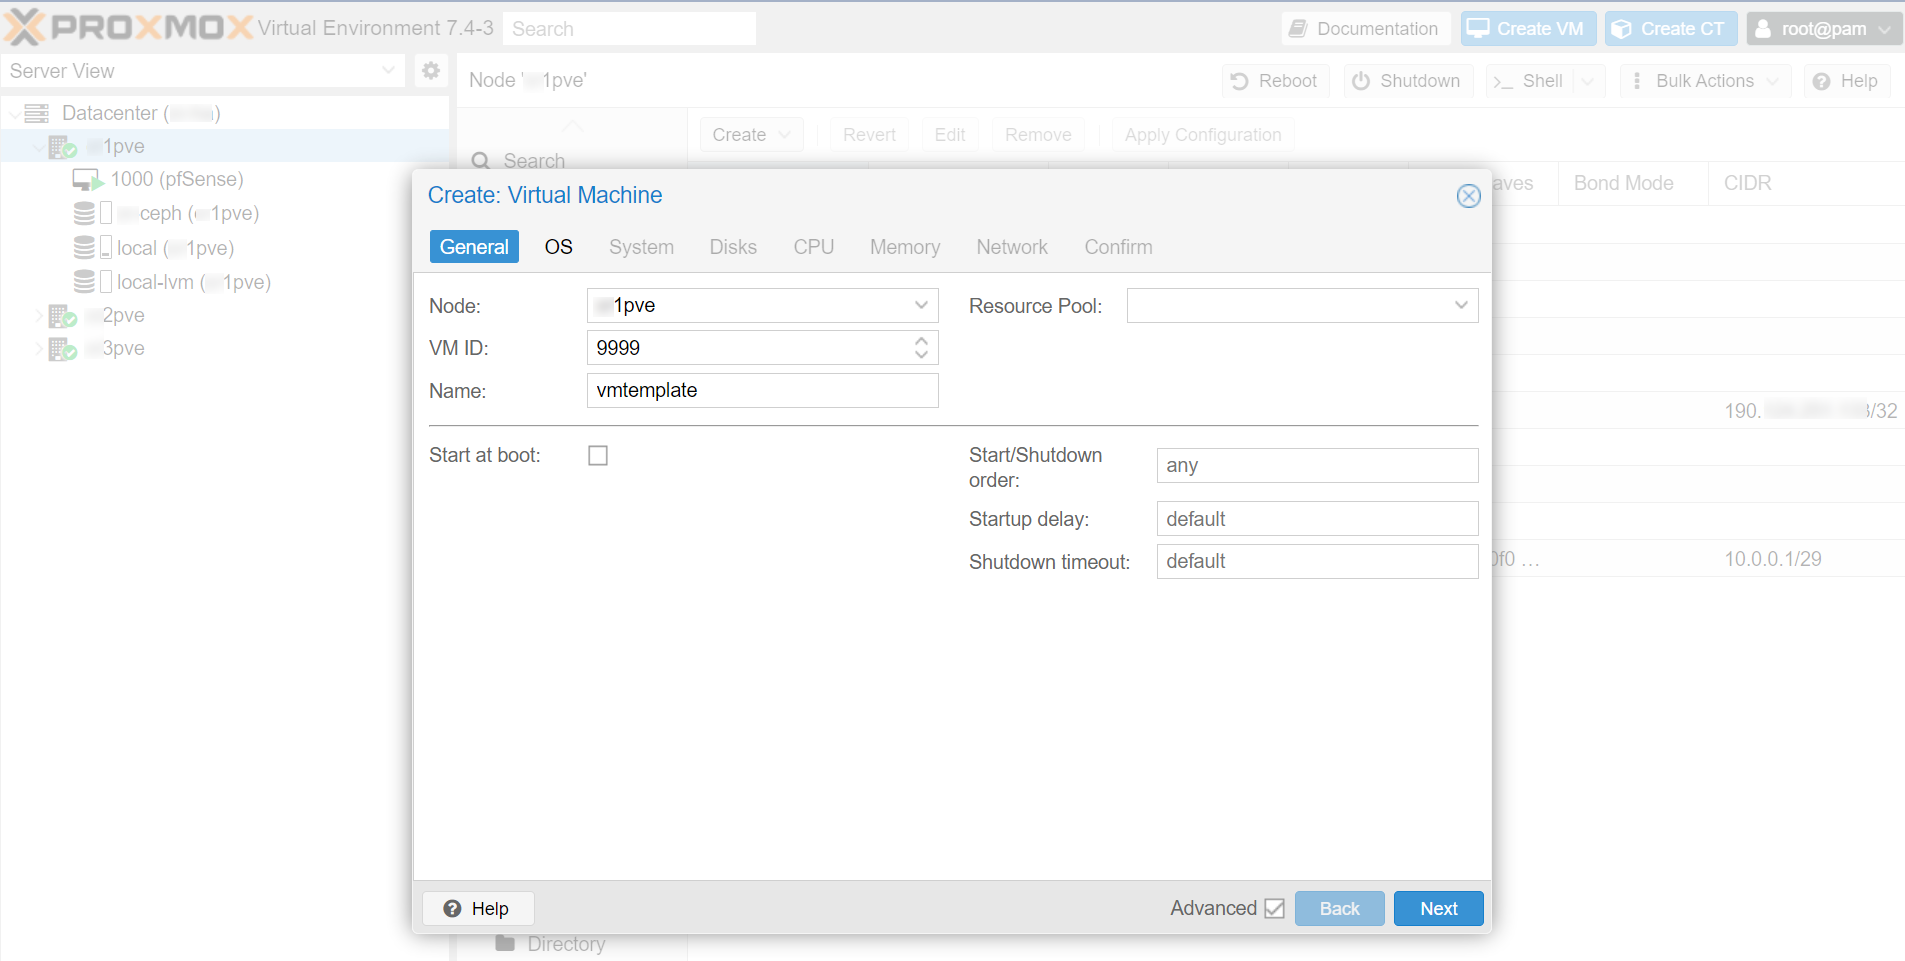
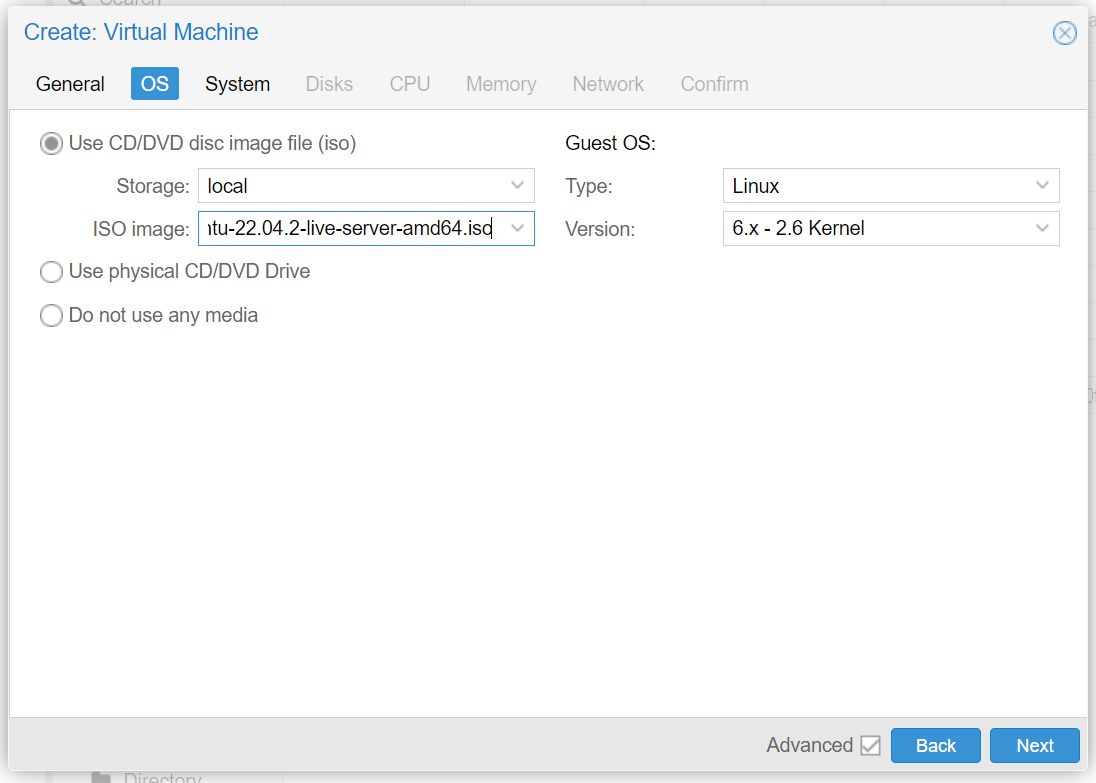
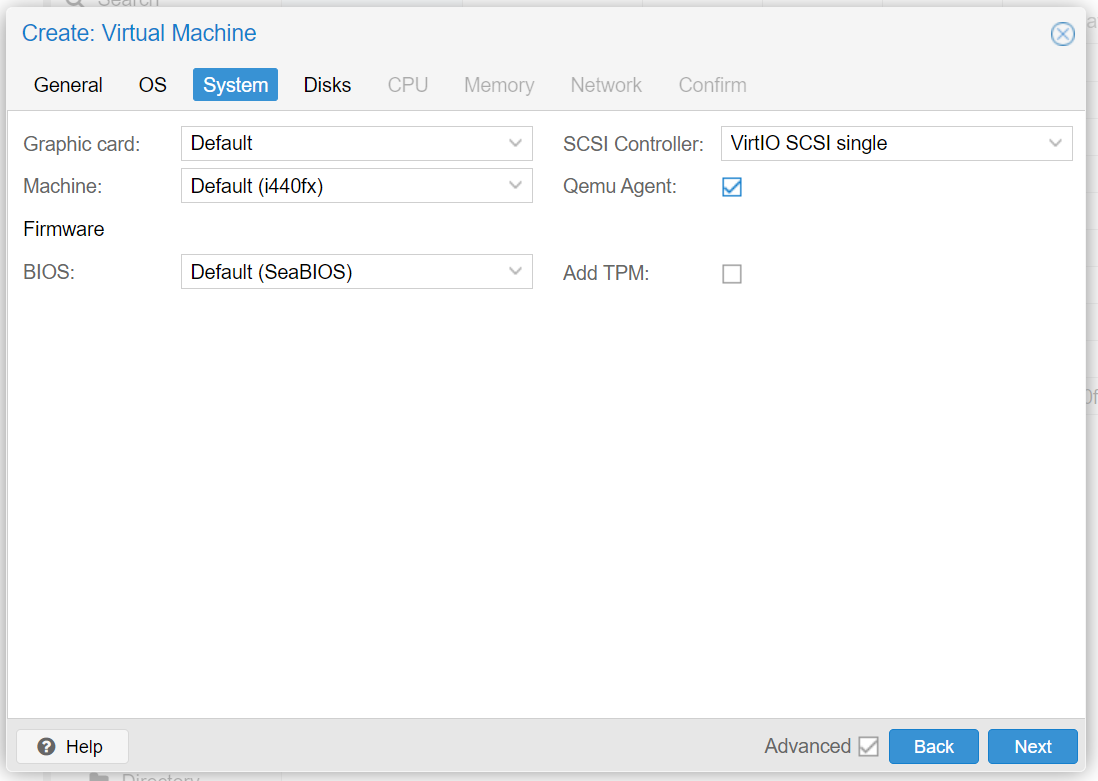
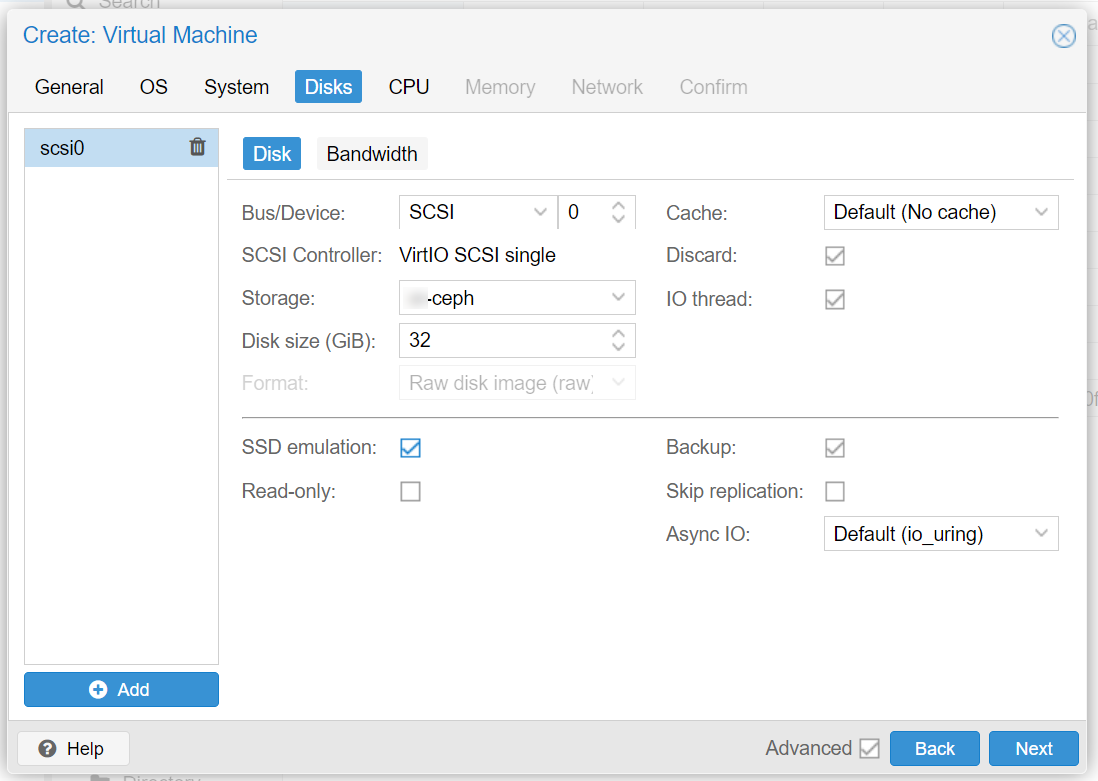
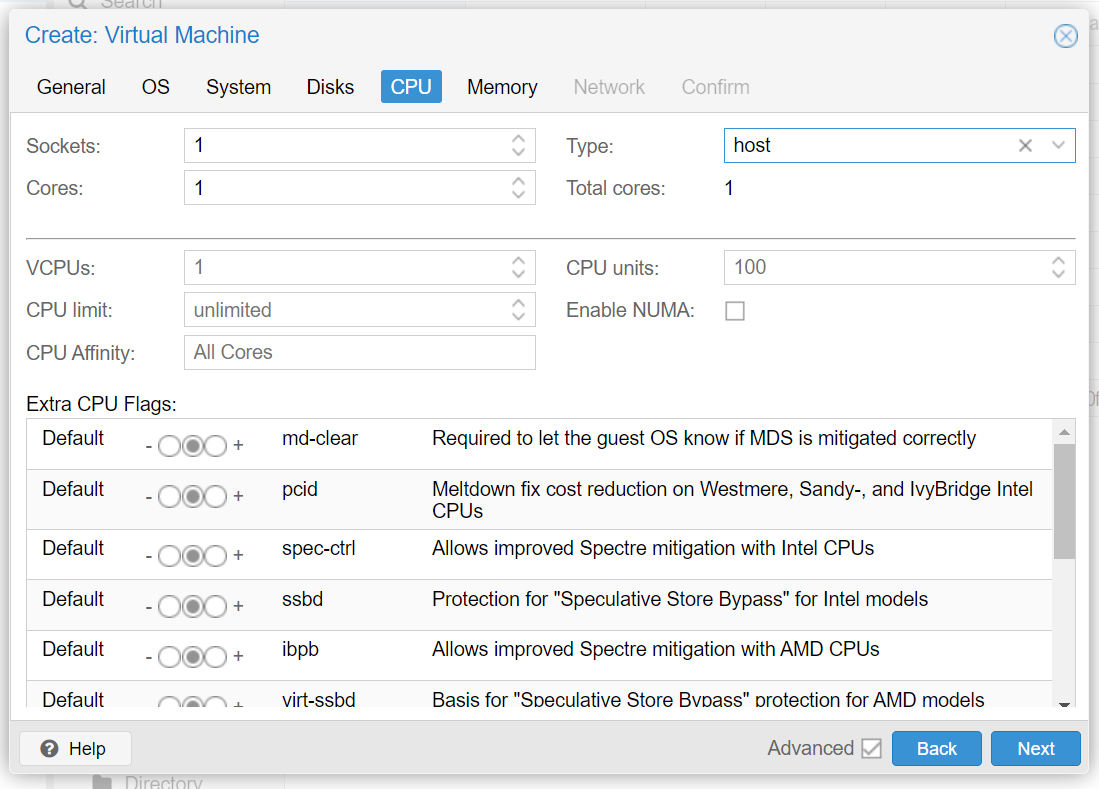
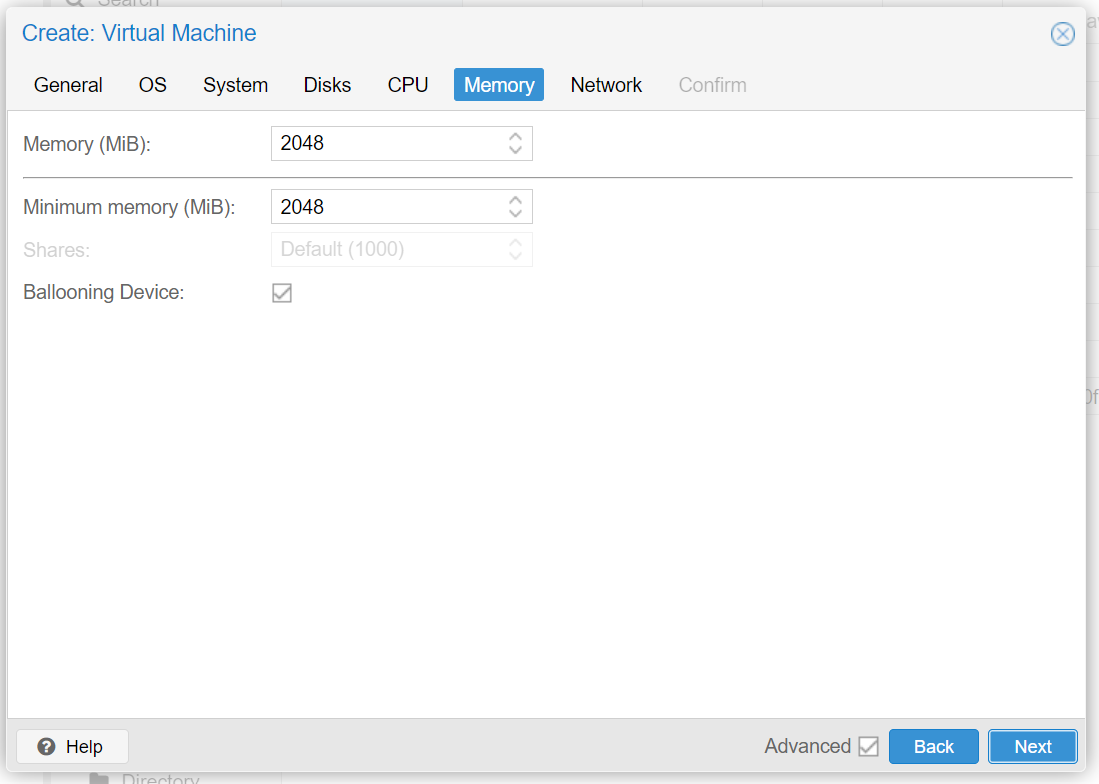
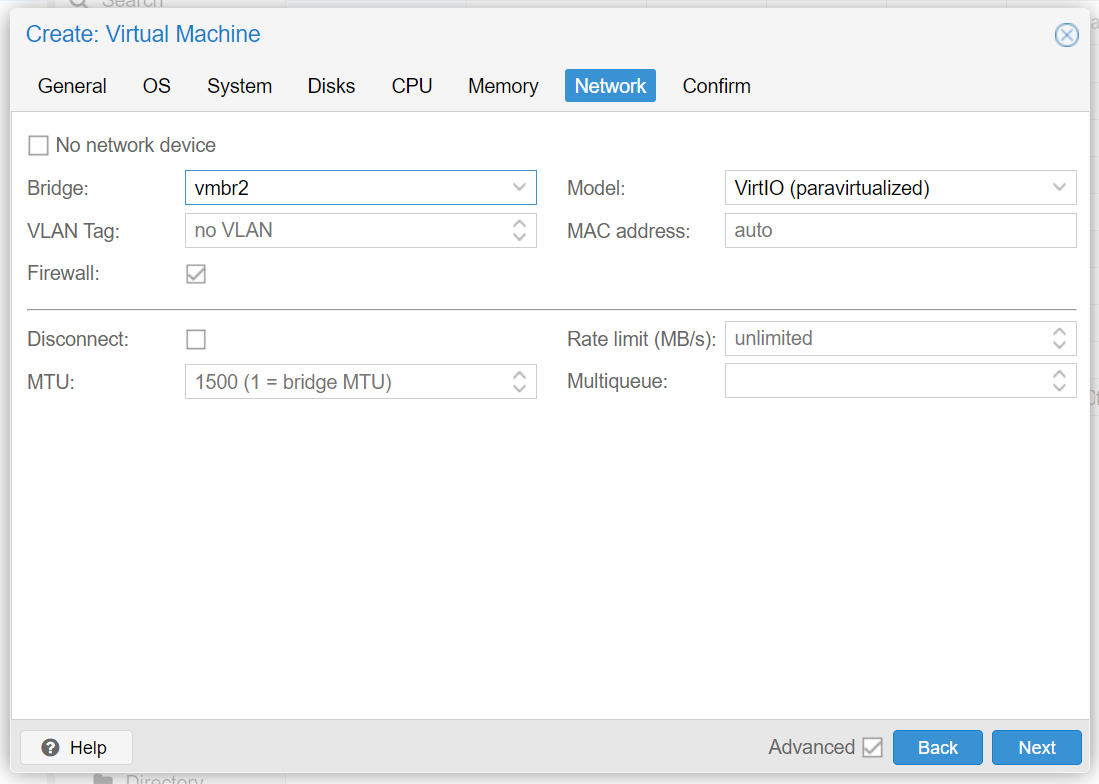
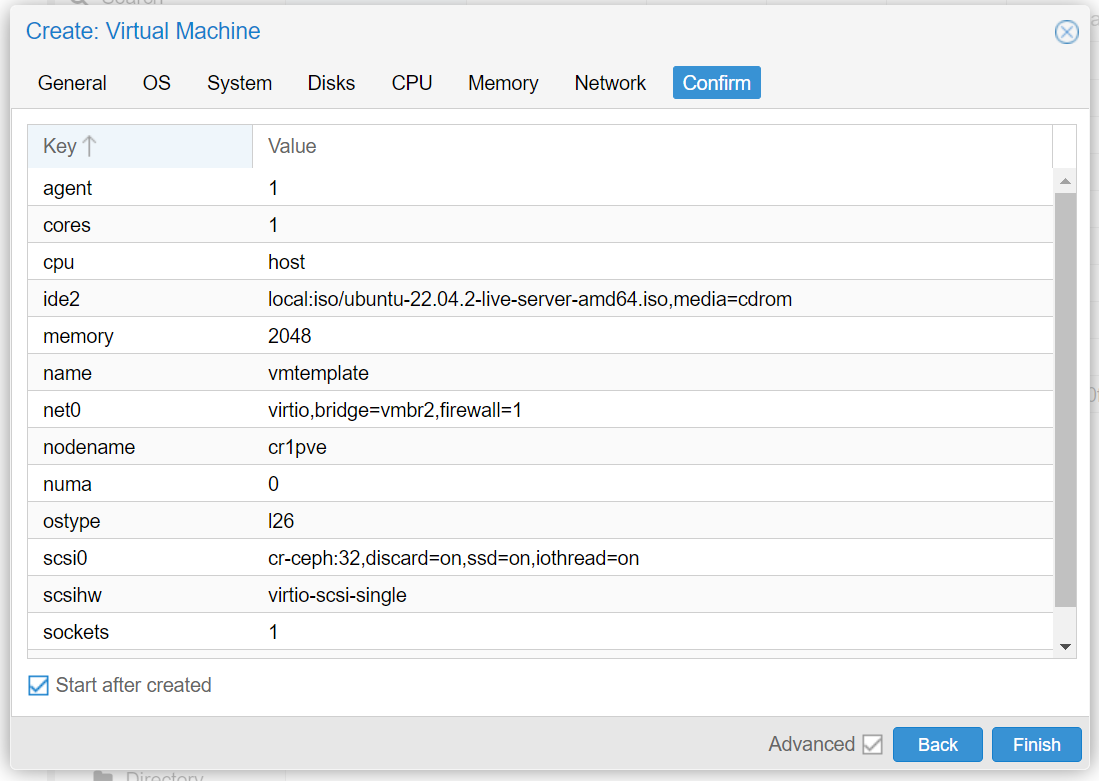
In the Proxmox GUI, make click on the blue Create VM button and a wizard will guide you through the process:
Remove 'cloud-init'
Unless you are using OpenStack, AWS, or similar services, then cloud-init may actually be slowing down the booting of your VM and eventually halt it from booting if it does not have a proper working IP.
This is how to disable cloud-init in Ubuntu (source here)
# Create an empty file to prevent the service from starting
sudo touch /etc/cloud/cloud-init.disabled
# Disable all services (uncheck everything except "None"):
sudo dpkg-reconfigure cloud-init
# Uninstall the package and delete the folders
sudo apt purge cloud-init
sudo rm -rf /etc/cloud/ && sudo rm -rf /var/lib/cloud/
Check that Emulator Agent is installed by installing it and reboot the system:
sudo apt install qemu-guest-agent
sudo reboot
Preconfigure VM
You may want to perform some minor configuration in your freshly deployed VM by following the instruction in this section.
Once you are happy with the basic accessibility and security of the virtual machine, you can then proceed to convert it in a template for future and recursive use in deploying additional machines of the same basic characteristics.
Converting a VM to Template in Proxmox is a one-way street, you will not be able to go back and make changes. The recommendation in this case is: 1- Make a copy (clone) of this VM, 2- Convert the clone to Template 3- Thus you can keep the original VM deactivated but available in case you want to update it, clone it and convert to a new template.
Convert VM to Template
Remove ssh keys
sudo rm /etc/ssh/ssh_host_*
Empty the machine id file:
sudo truncate -s 0 /etc/machine-id
cat /etc/machine-id
Check or create the symlink to the machine id file
sudo rm /var/lib/dbus/machine-id
sudo ln -s /etc/machine-id /var/lib/dbus/machine-id
ll /var/lib/dbus/machine-id
Delete the command history
sudo rm .bash_history
Cloning from Template
After spawning,
sudo nano /etc/hostname
sudo nano /etc/hosts
sudo dpkg-reconfigure openssh-server
sudo systemctl restart ssh
If increasing the disk size
sudo fdisk -l
sudo parted /dev/sda
(parted) print-> Fix
(parted) resizepart 2 100% -> Yes
(parted) quit
sudo resize2fs /dev/sda2